UNIVERSAL
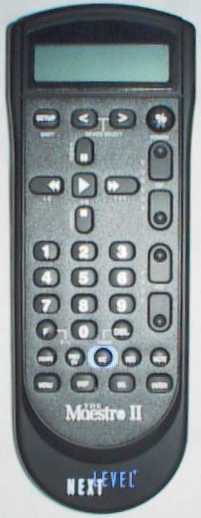
The Maestro II remote is a universal remote control. In addition to controlling the functions of the Motorola DCR-4000s digital audio tuner and all terminals, it also controls most other major brands of cable television terminals. The MAESTRO can be easily programmed to handle the functions of up to eight audio/video components, including CD players, laser disc players, VCRs, televisions, tuners/ amplifiers, tape decks and phonographs.
The unit also features VCR programming capability. Using the LCD and the remote's built-in clock, a subscriber can program all information needed to record a televised event. The unit then turns on the proper components and records the event at the designated time.
The Maestro II remote can be easily programmed by the subscriber to handle the functions of other remotes, such as picture-in-picture capability. The remote can also be programmed to turn on or off multiple services of the users choice.
DESIGNED FOR EASE OF USE
The Maestro II remote has been designed with subscriber ease in mind, making it the only remote necessary for the home entertainment system. The unit features a "HELP" key. By pushing this key, the subscriber enables a display to provide instructions for programming and operating functions of the remote. Other pertinent information is also displayed.
The aesthetics of the unit have been designed to fit comfortably in the hands of consumers, despite its sophisticated capability.
- FIND the 3-digit setup code for your brand of device (TV, VCR, Cable, etc.)
- HOLD DOWN the SETUP button until the screen on the remote reads 'CODE SETUP' - release.
- TAP the ENTER button once - the screen will read 'DEV SET UP'
- TAP the ENTER button once - the screen will have the device name on the left side. (Eg; 'TV')
- Use the RIGHT and LEFT "Device Select" buttons to select the device you wish to program.
- Some device buttons are used for more than one type of device, so you may need to use the CHANNEL UP and CHANNEL DOWN buttons to adjust the device type now.
- ENTER the setup code and then TAP the ENTER button once.
- TAP the POWER button. If the device does not shut off, repeat the previous two steps with the next setup code.
NOTE: For VCR, CD, and LD, it is best to have the device on, a tape or disc in, and test the device with the PLAY button.
- When you find a code that works your device - TAP the ESC (escape) button to exit. The screen will return to the device name and the time of day.
NOTE: At any point you can press escape (ESC) to return to the main display.
NOTE: Only use this method if you have already tried all of the setup codes listed in your manual for the brand of device you have.
- HOLD DOWN the SETUP button until the screen reads 'CODE SETUP' - release
- TAP the ENTER key once. The screen will read 'DEV SET UP'.
- TAP the CHANNEL DOWN button once. The screen will read 'DEV SEARCH'.
- TAP the ENTER button once - the screen will have the device name on the left side. (Eg; 'TV')
- Use the RIGHT and LEFT "Device Select" buttons to select the device you wish to program.
- TAP the POWER button.
- If the device does not shut off TAP the CHANNEL DOWN button once.
The remote will move to the next code. Try POWER again (repeat until the device shuts off).
NOTE: For VCR, CD, and LD, it is best to have the device on, a tape or disc in, and test the device with the PLAY button.
- TAP the ENTER button once when you get the device to turn off (locks in code).
- HOLD DOWN the SETUP button until the screen reads 'CODE SETUP'.
- TAP the ENTER button, the screen will read 'DEV SET UP'.
- TAP the CHANNEL DOWN button twice, the screen will read 'DEV NUMBER'.
- TAP the ENTER button, the screen will have the DEVICE name (TV, VCR, etc.) on the left and the code on the right.
- Use the LEFT and RIGHT "Device Select" buttons to check the other device codes.
- HOLD DOWN the SETUP button until the screen reads 'CODE SETUP'.
- TAP the CHANNEL DOWN button, the screen will read 'CONFIGURE'.
- TAP the ENTER button, the screen will read 'VOL LOCK'.
- TAP the ENTER button once, the screen will change to 'UNLOCK'.
- TAP the CHANNEL DOWN button once to change to 'LOCK'.
- TAP the ENTER button, the screen will show the last device you used.
- TAP the DEVICE button where you want to volume to come from.
- TAP the ENTER button, and that device will control the volume.
- HOLD DOWN the SETUP button until the screen reads 'CODE SETUP'.
- TAP the CHANNEL DOWN button twice, the screen will read 'CONFIGURE'.
- TAP the ENTER button, the screen will read 'VOL LOCK'.
- TAP the ENTER button once, the screen will change to 'UNLOCK'.
- TAP the ENTER button, and you will return back to the main screen - the volume will be reset.
If you wish to use more than one function on a single button, you will need to use the "un-official" shift button (ie, the SETUP button) rather than the actual SHIFT button.
- Select a device mode using the LEFT and RIGHT "device select" buttons. (Optional, will establish the default mode)
- HOLD DOWN the SETUP button until the screen reads 'CODE SETUP'.
- TAP the CHANNEL DOWN button, the screen will read 'CONFIGURE'.
- TAP the CHANNEL DOWN button twice, the screen will read 'KEY MOVER'.
- TAP the ENTER button, the screen will read 'FROM'.
- Select the device mode the function comes FROM using the LEFT and RIGHT "device select" buttons. (Optional, will use the default established above if ommited)
- TAP the button you wish to move. The screen will read 'TO'.
- Select a device mode to use the funtion, using the LEFT and RIGHT "device select" buttons. (Optional, will use the default established above if ommited)
- TAP the button you want to move the function TO, the screen will go back to the main display.
To put the function on a shifted key, simply press SETUP before the last step above. Then, to access the function use the SETUP button instead of the SHIFT button.
To test an advanced code before you program it to a button, simply press SETUP followed by the 3 digit code and the remote should issue the function.
If you wish to use more than one function on a single button, you will need to use the "un-official" shift button (ie, the SETUP button) rather than the actual SHIFT button.
- Find the 3-digit advanced code for the original function of your remote. (Click here for advanced codes).
- Select a device mode using the LEFT and RIGHT "device select" buttons. (Optional, will establish the default mode)
- HOLD DOWN the SETUP button until the screen reads 'CODE SETUP'.
- TAP the CHANNEL DOWN button, the screen will read 'CONFIGURE'.
- TAP the CHANNEL DOWN button twice, the screen will read 'KEY MOVER'.
- TAP the ENTER button, the screen will read 'FROM'.
- Select the device mode the function comes FROM using the LEFT and RIGHT "device select" buttons. (Optional, will use the default established above if ommited)
- TAP the SETUP button and enter the 3-digit Advanced Code. The screen will read TO.
- Select a device mode to use the funtion, using the LEFT and RIGHT "device select" buttons. (Optional, will use the default established above if ommited)
- TAP the button you want to move the function TO, the screen will go back to the main display.
To put the function on a shifted key, simply press SETUP before the last step above. Then, to access the function use the SETUP button instead of the SHIFT button.
- Select a device mode using the LEFT and RIGHT "device select" buttons. (Optional, sets the default device)
- HOLD DOWN the SETUP button until the screen reads 'CODE SETUP'.
- TAP the CHANNEL DOWN button twice, the screen will read 'CONFIGURE'.
- TAP the ENTER button, the screen will read 'VOL LOCK'.
- TAP the CHANNEL DOWN button, the screen will read 'KEY MOVER'.
- TAP the ENTER button, the screen will read 'FROM'.
- Select a device mode using the LEFT and RIGHT "device select" buttons, where you wish to delete the function FROM. (Optional, will use the default established above if ommited)
- TAP the button you wish to delete. The screen will read 'TO'.
- TAP the button you wish to delete again, the screen will go back to the main display.
NOTE: To deleted a 'shift' key, press SETUP between the two presses of the button that you want to clear. EXAMPLE:
- Select a device mode using the LEFT and RIGHT "device select" buttons. (Optional, sets the default device)
- HOLD DOWN the SETUP button until the screen reads 'CODE SETUP'.
- TAP the CHANNEL DOWN button, the screen will read 'CONFIGURE'.
- TAP the ENTER button, the screen will read 'VOL LOCK'.
- TAP the CHANNEL DOWN button, the screen will read 'KEY MOVER'.
- TAP the ENTER button, the screen will read 'FROM'.
- TAP the DEVICE button where you wish to delete the function FROM. (Optional, will use the default established above if ommited)
- TAP the button you wish to delete. The screen will read 'TO'.
- TAP the SETUP button.
- TAP the button you wish to delete again, the screen will go back to the main display.
- HOLD DOWN the SETUP button until the screen reads 'CODE SETUP'.
- TAP the CHANNEL DOWN, the screen will read 'CONFIGURE'
- TAP the ENTER button, the screen will read 'VOL LOCK'
- TAP the CHANNEL DOWN key seven times, the screen will read 'CLEAR ALL'.
- TAP the ENTER button, the screen will read 'CLR ALL'
- TAP the ENTER button, the screen will read 'CONFIRM'
- TAP the ENTER button, the screen will return to the main display.
NOTE: This will not clear the codes assigned to the device buttons.
- Select TV mode using the LEFT and RIGHT "device select" buttons.
- HOLD DOWN the SETUP button until the screen reads 'CODE SETUP'.
- TAP the CHANNEL DOWN button one time. The screen will read 'CODE SETUP'.
- TAP the ENTER button once, the screen will read 'DEV SETUP'.
- TAP the ENTER button and the screen will read 'TV'.
- ENTER code 9-7-1. These numbers will appear on the screen.
- TAP the ENTER button and the screen will return to the main display.
Note: If 971 doesn't work, you can also try 972, 961 and 962.
- HOLD DOWN the SETUP button until the screen reads 'CODE SETUP'.
- TAP the CHANNEL UP button once, the screen will read 'CONFIGURE'.
- TAP the ENTER button, the screen will read 'VOL LOCK'.
- TAP the CHANNEL UP button once and the screen will read 'SERVICE'.
- TAP ENTER, the screen will read 'MFG RESET'.
- TAP ENTER, the screen will read 'SEL TO RS'.
- TAP ENTER, the screen will return to the main display.
- HOLD DOWN the SETUP button until the screen reads 'CODE SETUP'.
- TAP the CHANNEL UP button once, the screen will read 'CONFIGURE'.
- TAP the ENTER button, the screen will read 'VOL LOCK'.
- TAP the CHANNEL UP button once and the screen will read 'SERVICE'.
- TAP ENTER, the screen will read 'MFG RESET'.
- TAP the CHANNEL DOWN button once and the screen will read 'DEVICE LOCK'.
- TAP ENTER, the screen will read 'SEL DEV'.
- TAP the device key that you wish to lock or unlock, the screen will show the device name followed by "UL".
- TAP the CHANNEL DOWN button to change the setting from 'UL' to 'L'.
- TAP ENTER, the screen will return to the main display.
 If a button stops working due to over use, it is possible to fix it. There is a product
that you can get from most auto part stores made by Loctite called "Quick Grid Rear Window
Defogger Repair Kit". It is a conductive fluid usually used to fix rear window defrosters
in cars. To fix your remote, open up the casing and paint the fluid on the base of the
buttons that are not working effectively, et it dry, and it should work again, good as new!
If a button stops working due to over use, it is possible to fix it. There is a product
that you can get from most auto part stores made by Loctite called "Quick Grid Rear Window
Defogger Repair Kit". It is a conductive fluid usually used to fix rear window defrosters
in cars. To fix your remote, open up the casing and paint the fluid on the base of the
buttons that are not working effectively, et it dry, and it should work again, good as new!